Quickstart
Welcome! Follow the steps in this topic to get started with setting up your first usable form. At a high-level, the following steps are required:
- link a WhatsApp Business Account (may need to be created)
- create & publish a form
Let’s dive in.
Pre-requisites
In order to follow along with this topic, you’d need to have an existing account and organisation within the Edge platform. If you do not have this set up yet, please reach out to sales@tregter.com.
You also need a mobile number for your business, we recommend getting an e-sim through Melon Mobile or Airalo. If using Airalo, ensure that you get an e-sim with Data/Calls/Text, not a data only e-sim. Data-only e-sims do not have mobile numbers and won’t work with WhatsApp.
Link a WhatsApp Business Account
To link a WhatsApp Business Account, access the Whatsapp tab. From there you can click Login with Facebook. This will kick off a flow where you can either create a new WhatsApp Business Account, or link an existing one. Simply follow the on-screen instructions:
- When prompted to select a business account/portfolio, you’d also have the ability to create a new account/portfolio if you do not yet have one set up yet.
- You’ll be asked to enter a phone number. This is a number that will be used for the WhatsApp business, and the number that users on WhatsApp will message to interact with your forms. Facebook will confirm that you are the owner of this number via an OTP before allowing you to add it.
Once the signup flow is completed, the process of linking your WhatsApp Business Account will have kicked off in the background - this could take up to a minute. Refresh the page, and you should see your account listed. To test the configuration, select Manage > Send message and enter a number you’d like to send a test message to from your WhatsApp business account.
Create a form
To create a form, navigate to Forms > Create Form. Enter a form name and a description. Once created, you will be able to access and configure the form. Select the newly created form from the list.
To start, we will focus on the Edit Form, Numbers & Settings sections of a form.
Edit Form
This section is where we define our schema. As an example we will look into two scenarios:
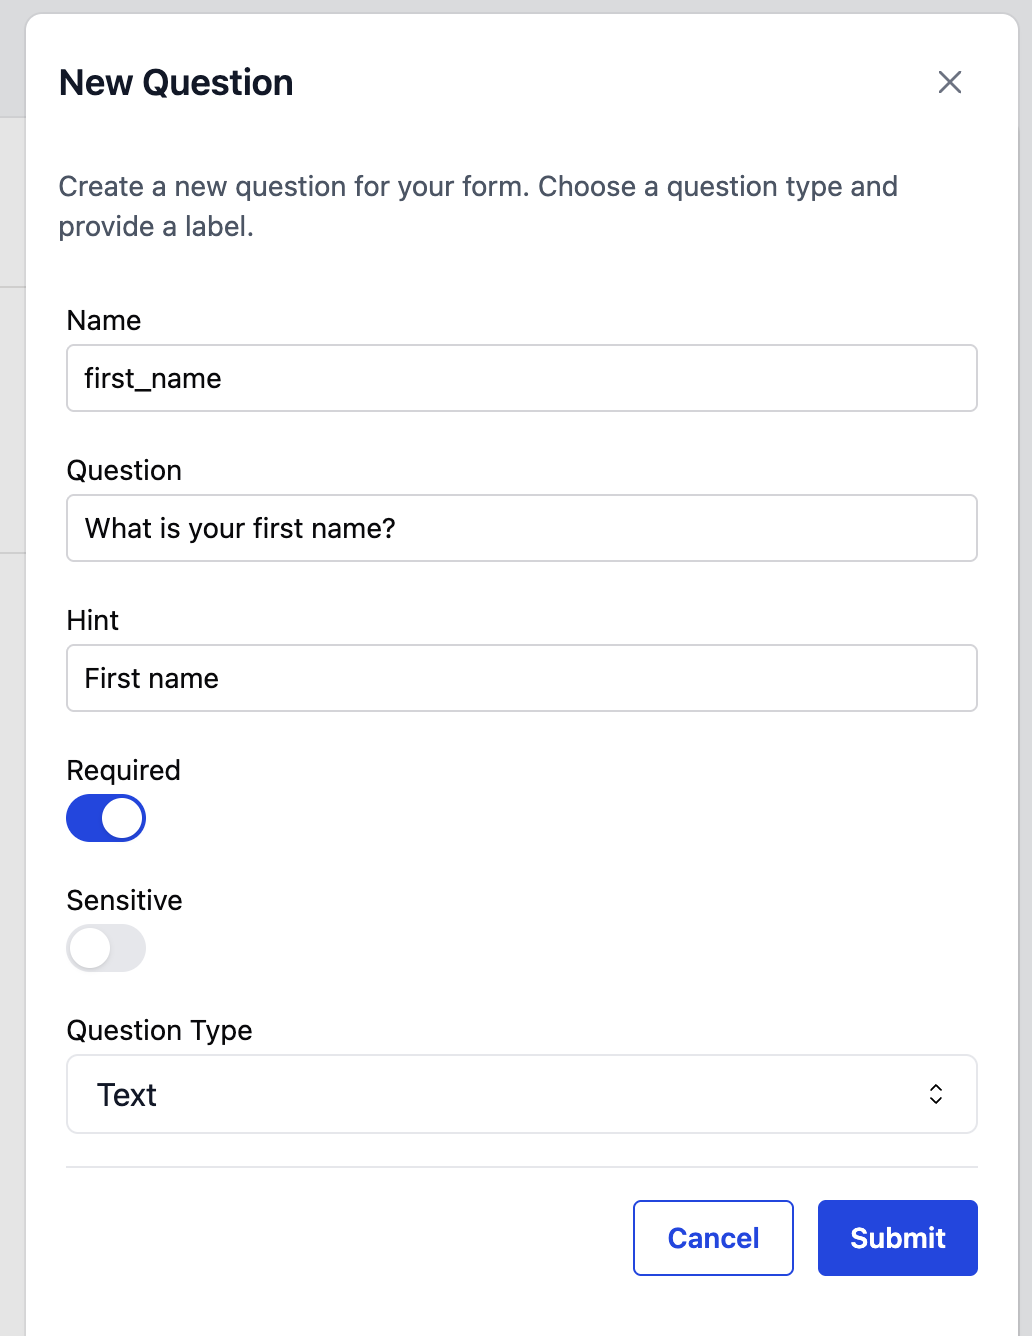
Standard text input
Each question has a Name (used as the key in the submitted data), a Question (what the respondent sees), and a Hint (shown in / above the input field). Toggle Required to make the field mandatory, or Sensitive to mark it as personal information, which will only then be viewable by users marked as Sensitive Viewers or higher. Pick a Question Type to choose the input control. In this case, we chose a text field, as first name is a standard text input.
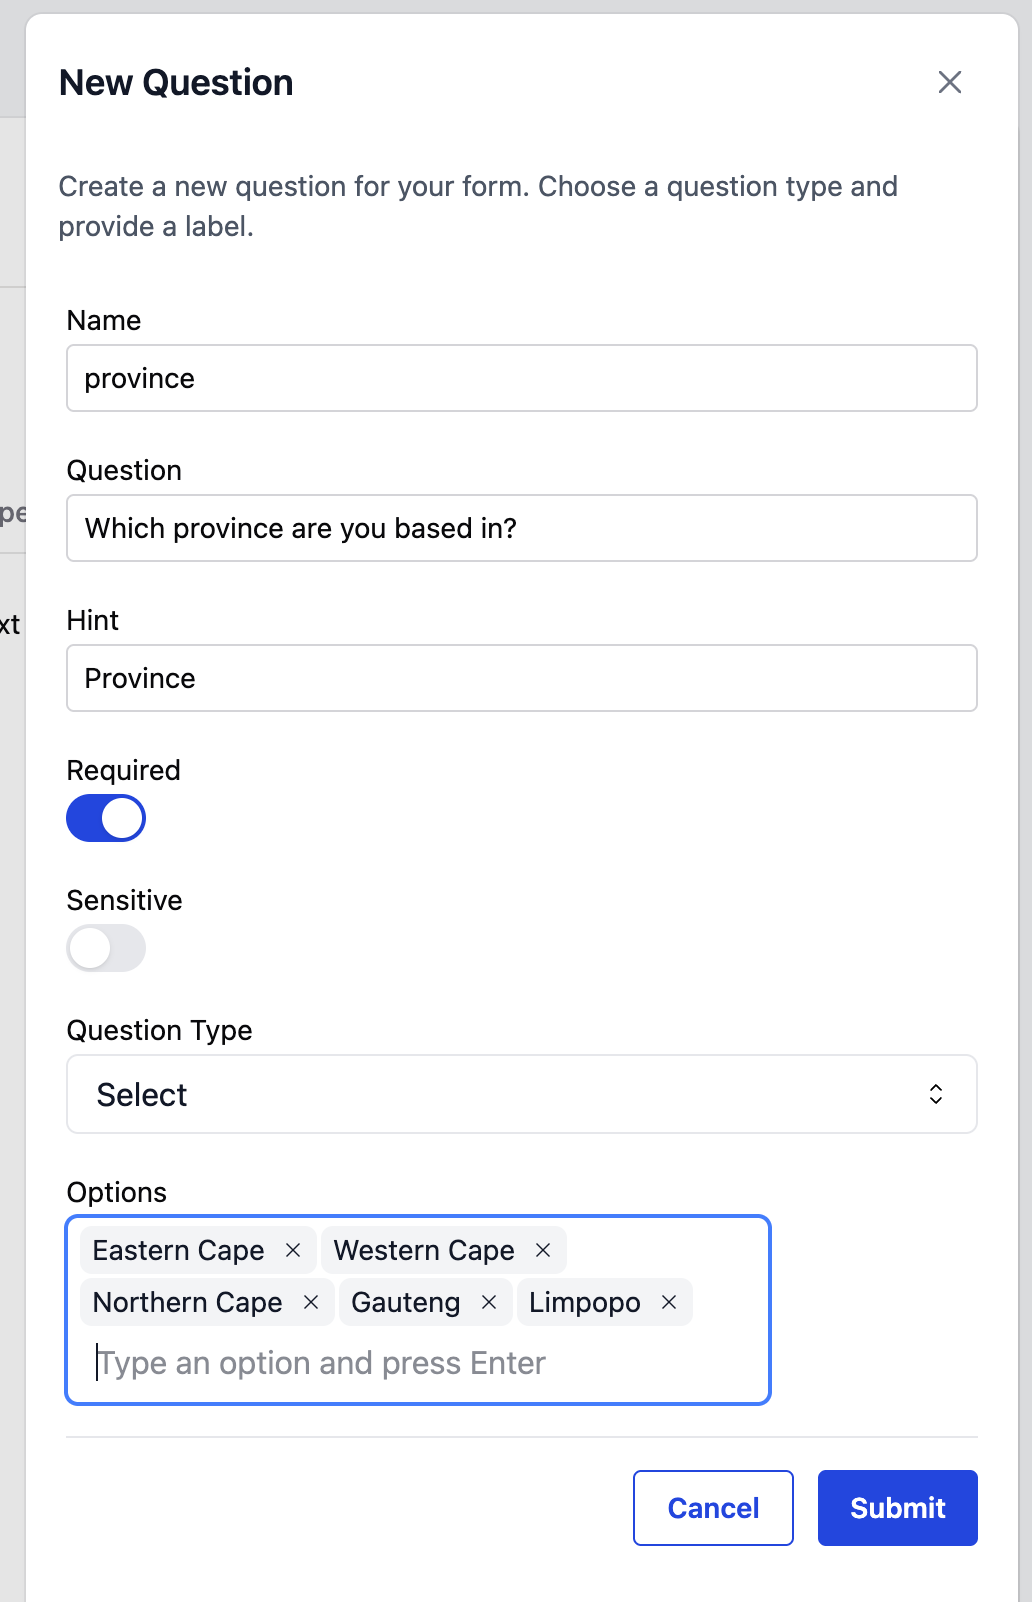
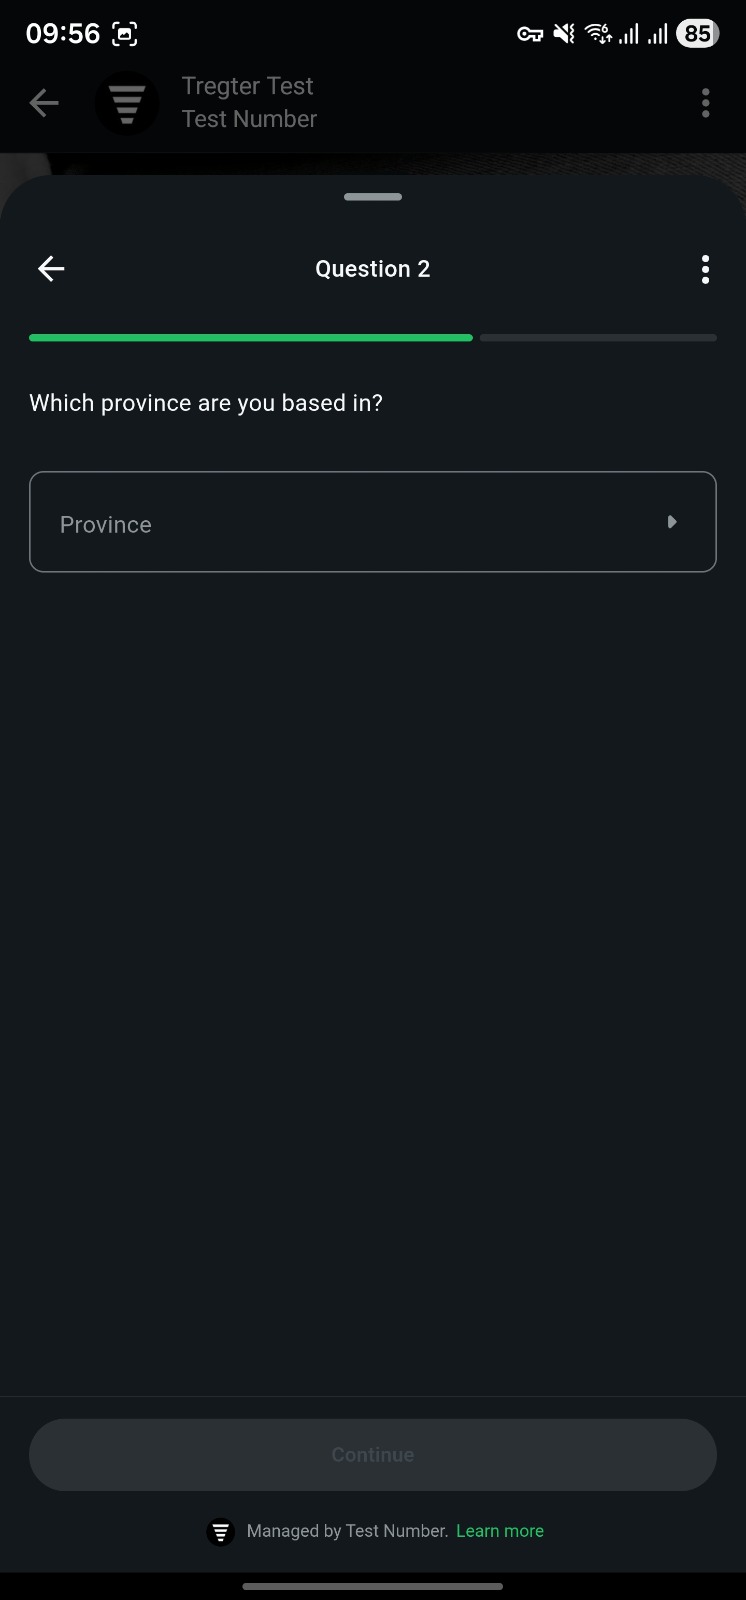
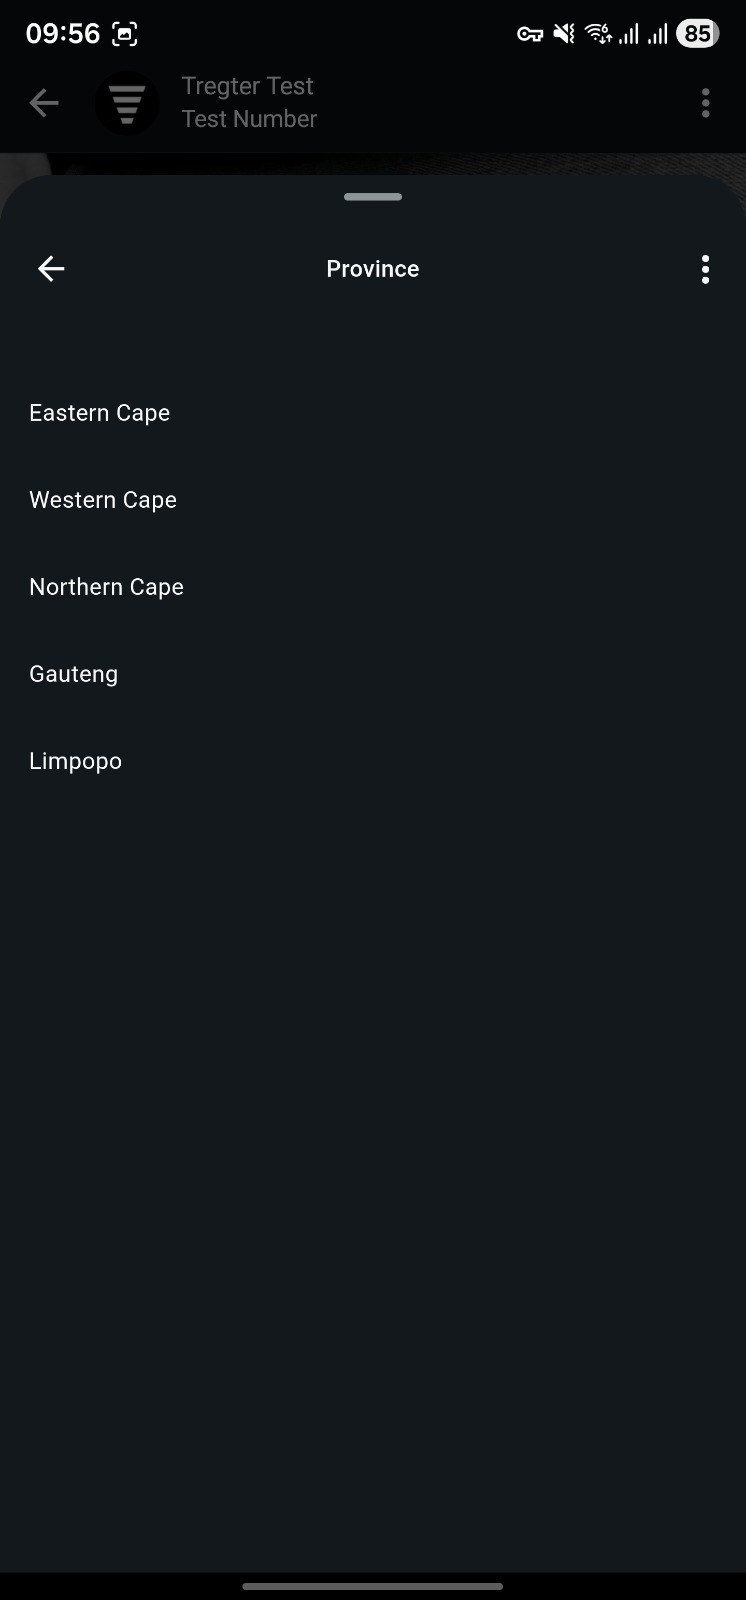
Select input
For the Name, Question, Required and Sensitive input fields, the same rules apply as discussed above. Unlike earlier, however, Select fields have a set number of options a user gets to choose from. In this scenario, we’ve listed 5 provinces that a user can choose from. These 5 options would be listed in WhatsApp, from which the user can select one.
Once these questions have been submitted, we can move onto the next section.
Numbers
The numbers section would list all the numbers that your WhatsApp Business Accounts have access to. For a form to be accessible through any of those numbers, we need to link the form to them. We do this by selecting the numbers of interest.
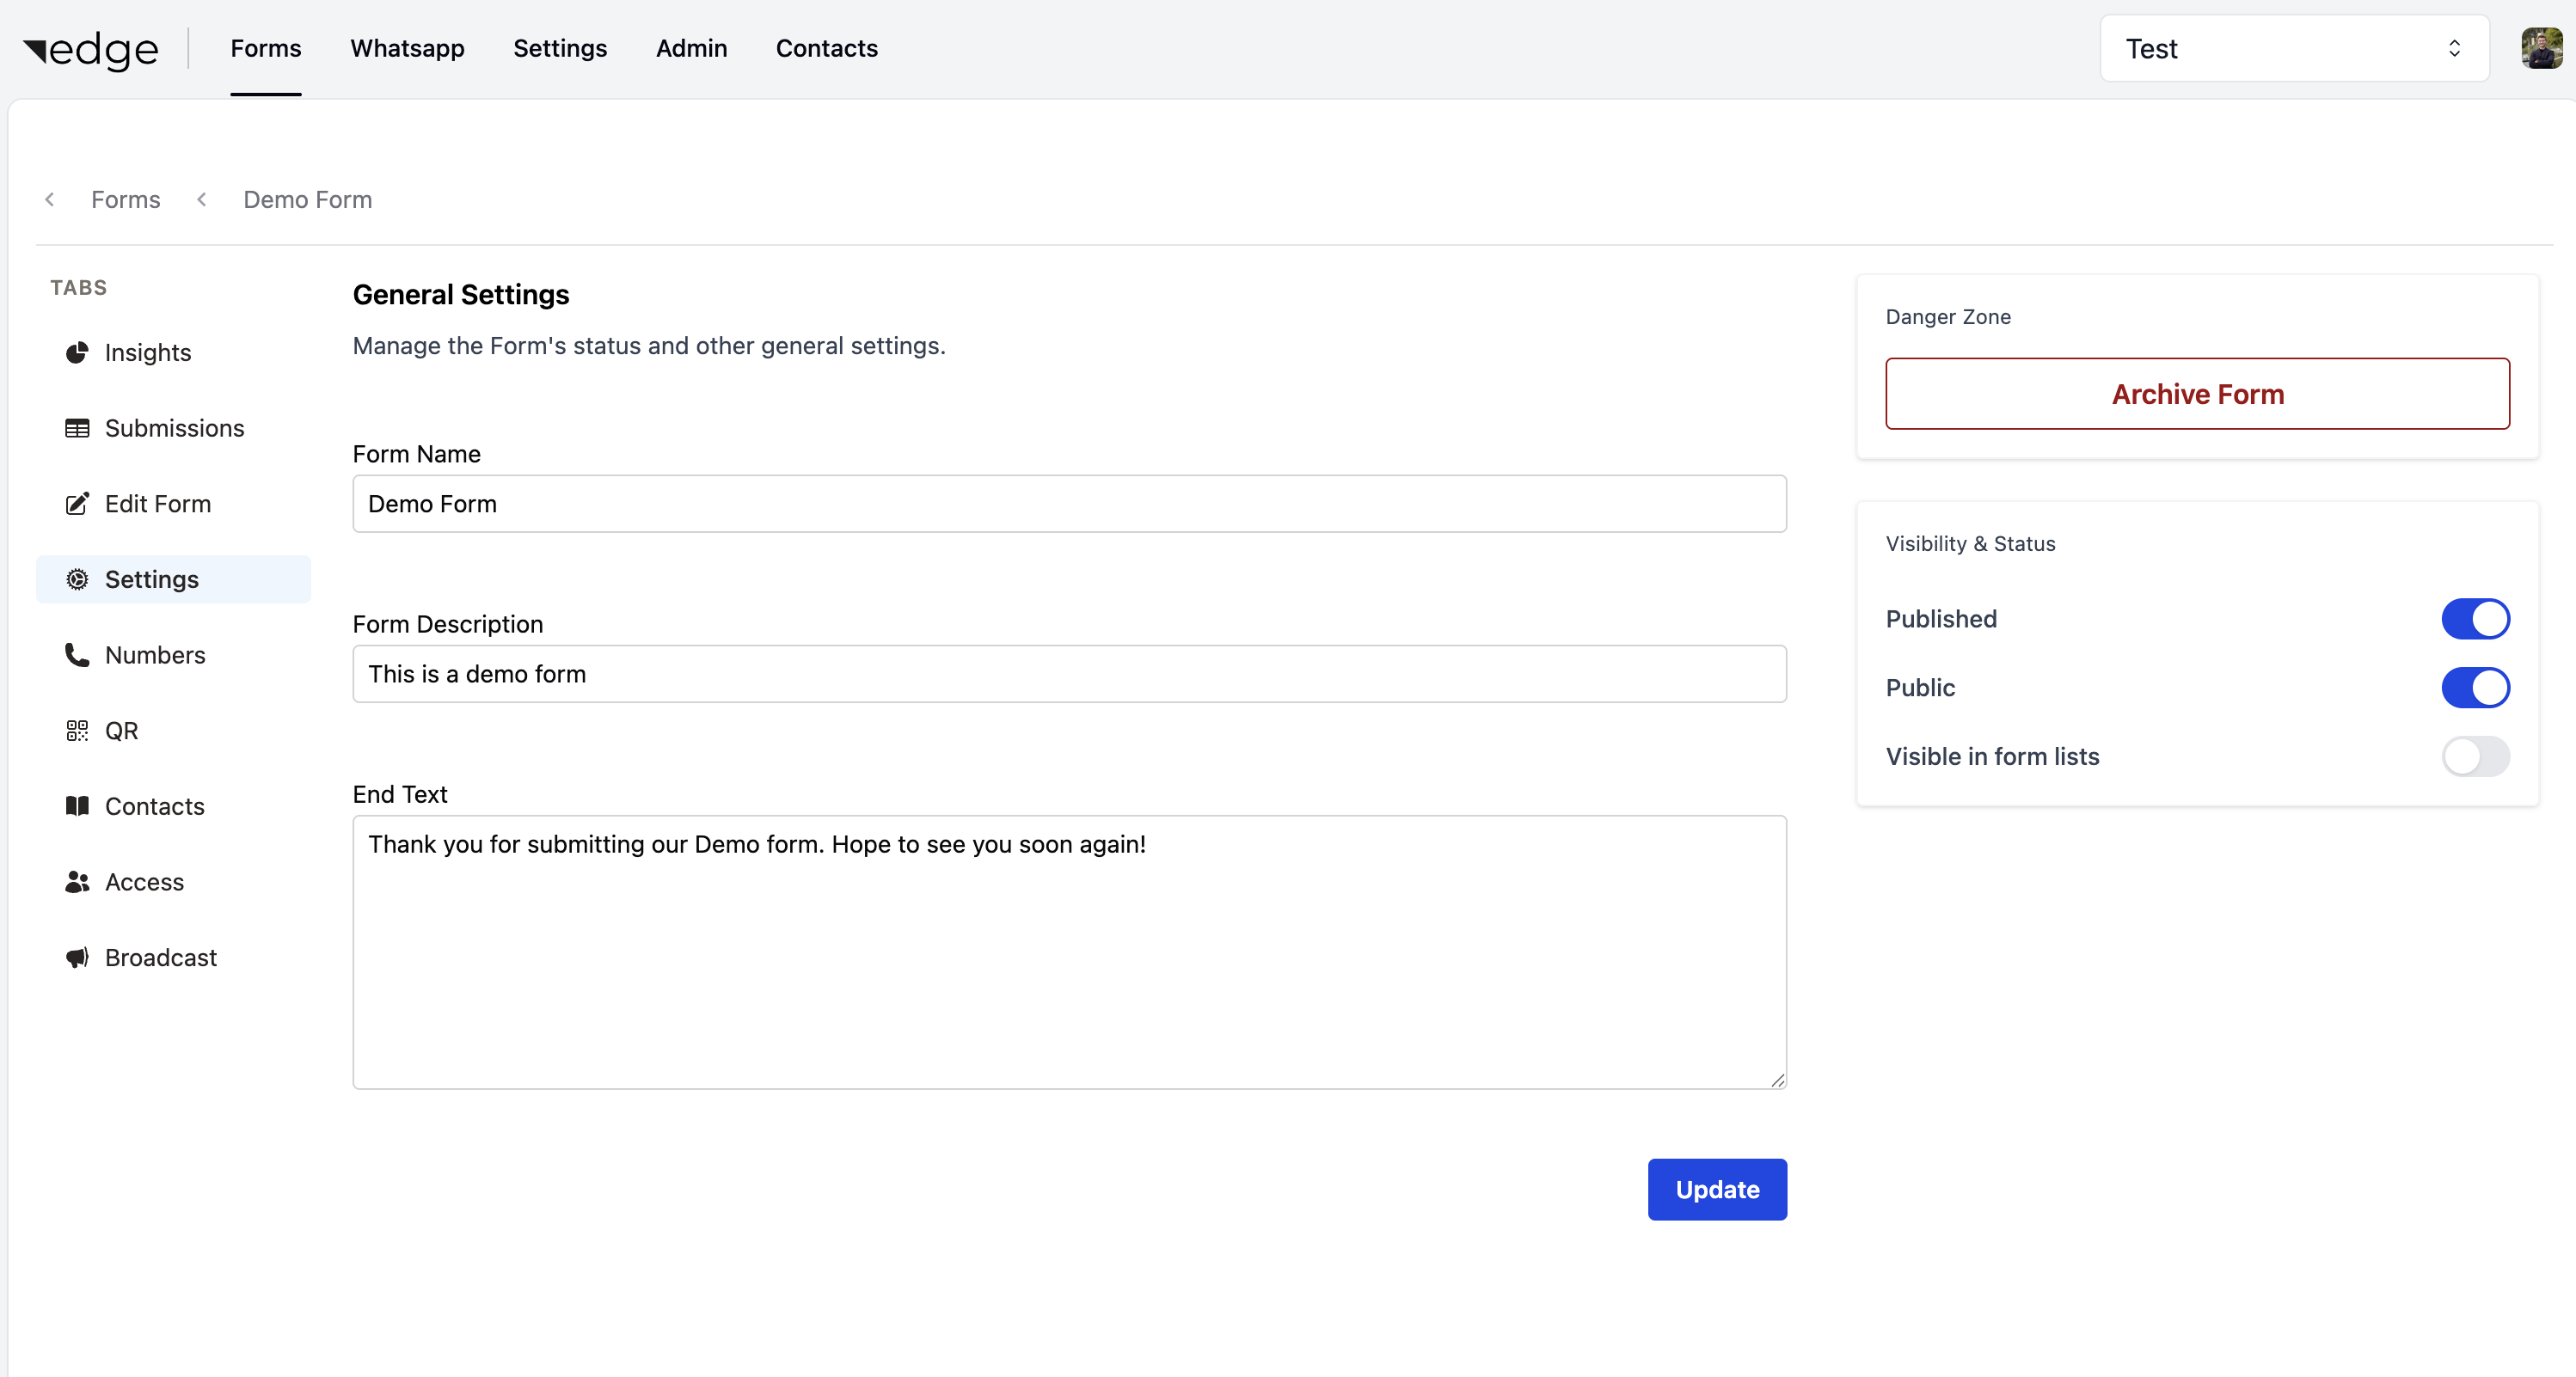
Settings
The settings page gives you access to the Name, Description and End Text. Name and Description was initially set at creation, and End Text is a body of text you can set to show at the end of the form.
To get the form live and accessible, it needs to be Published and either Public, or access must be granted to the relevant individuals via the Contacts section. For the sake of this demo, we will use a Public form. We will thus select the form to be Public and Published. Please note that the publishing process make take a few seconds, as the form needs to be registered on WhatsApp’s side for each number.
For the demonstration, I’ve also added End Text. The end result should look similar to the image below:
Let’s test!
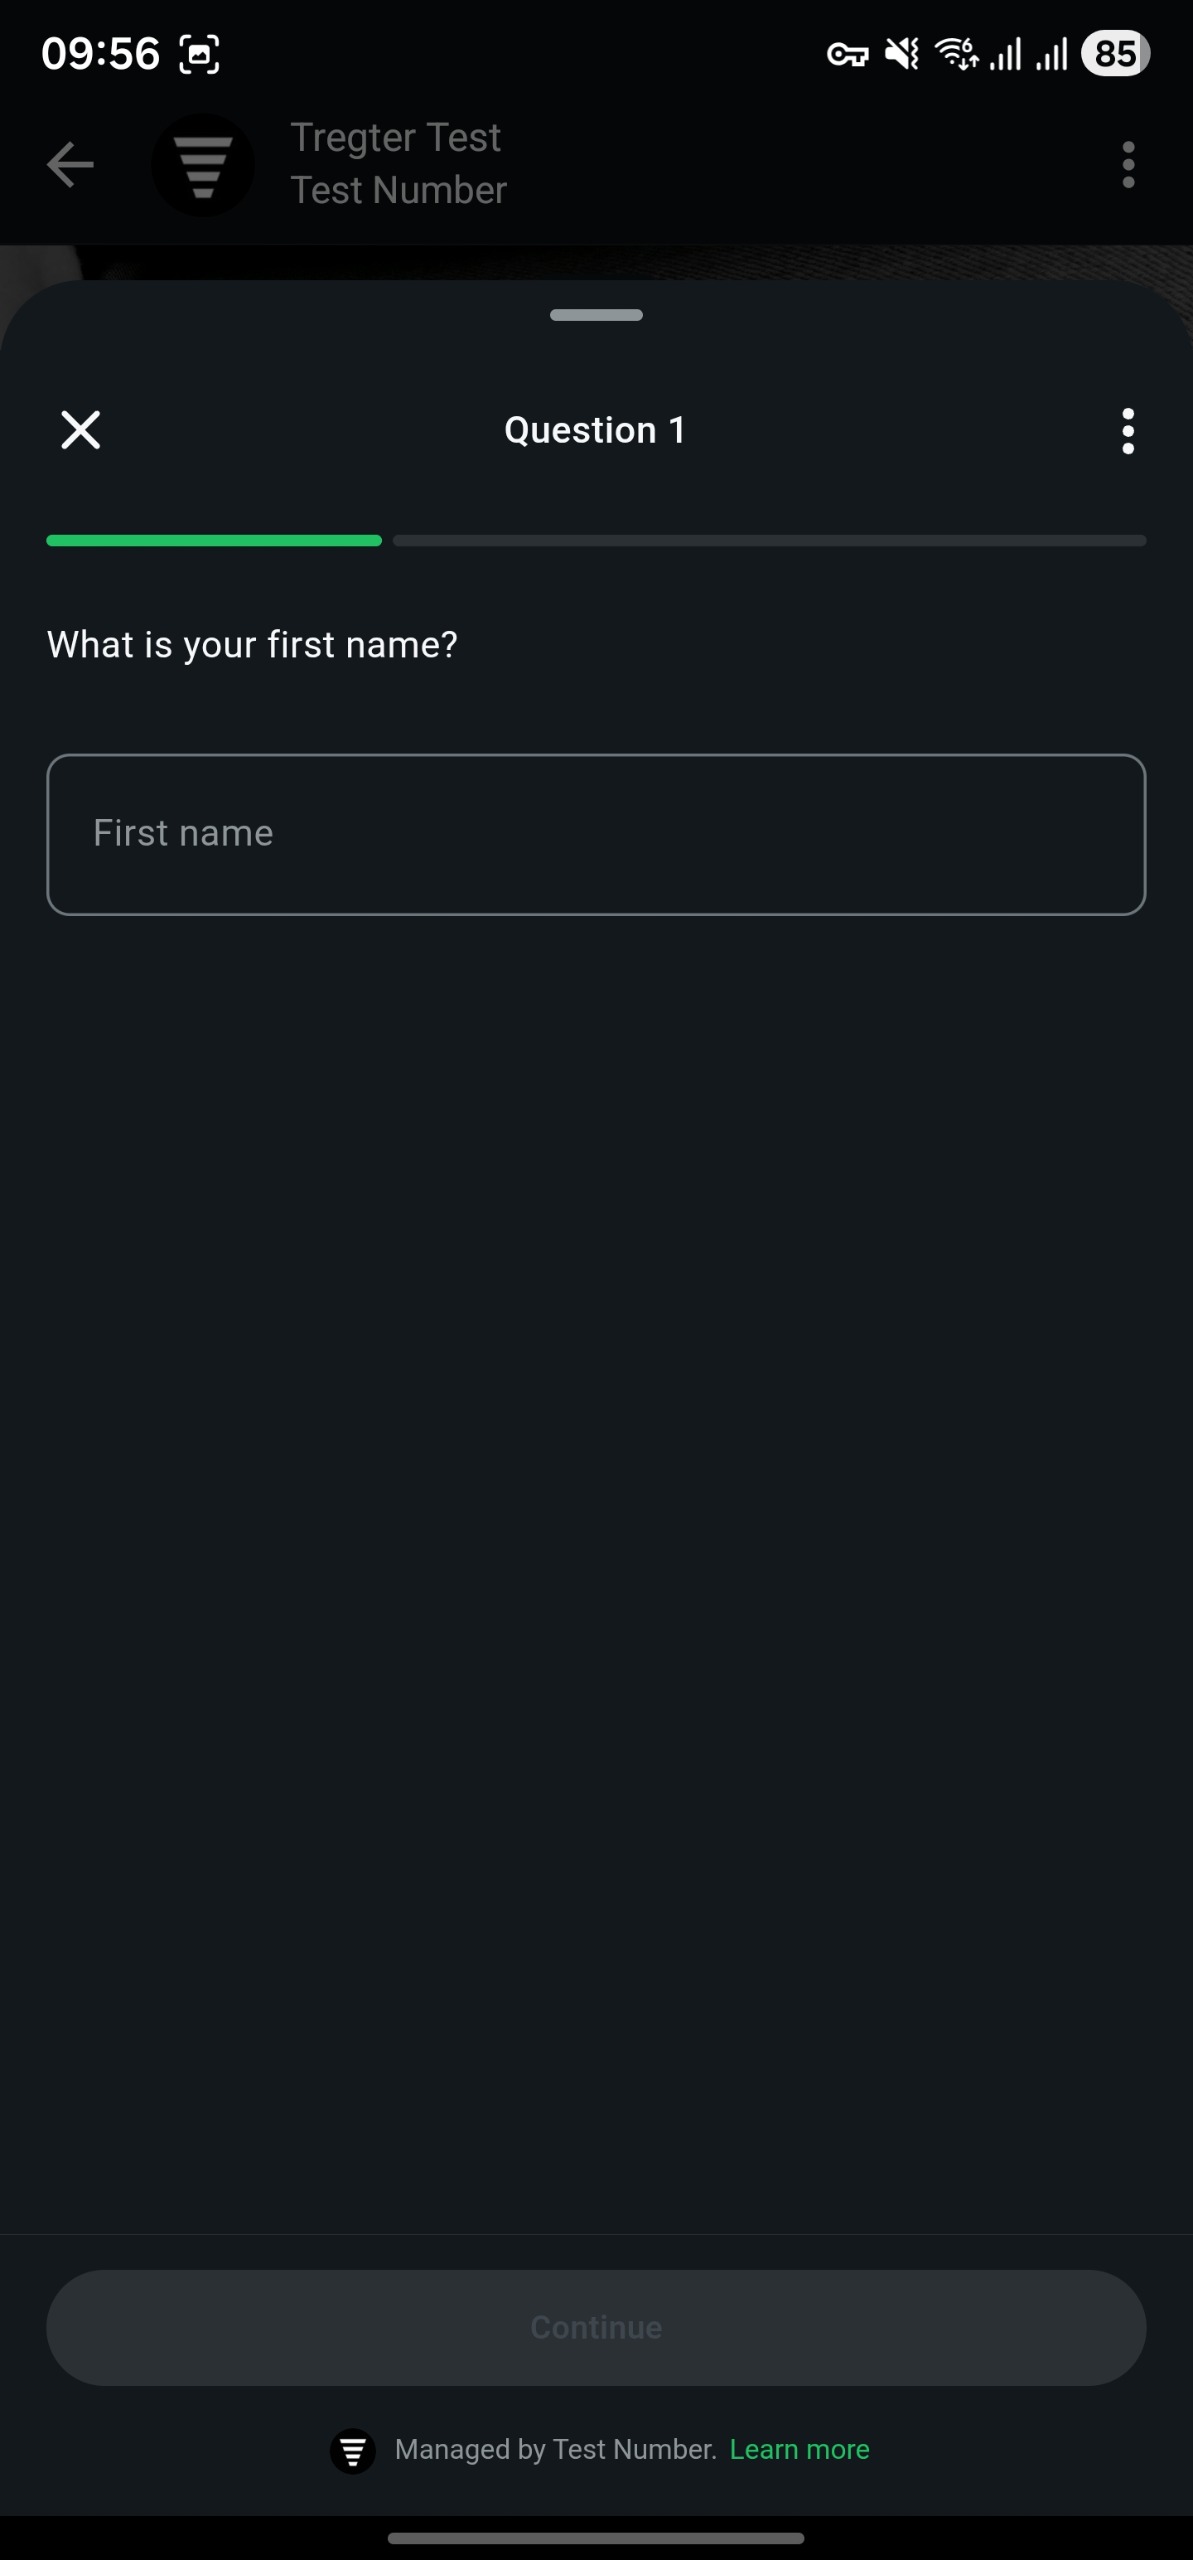
Now that our form has been configured and published, let’s access it via the generated QR code(s). There will be a QR code for each selected WhatsApp number. Navigate to the QR page, and scan the QR code on the page for any of the available numbers (if only one number is linked, only one option will show). Following this QR code will take you to WhatsApp and pre-populate a message to request the form from the selected WhatsApp number. You should be sent a message, which contains the below looking form:
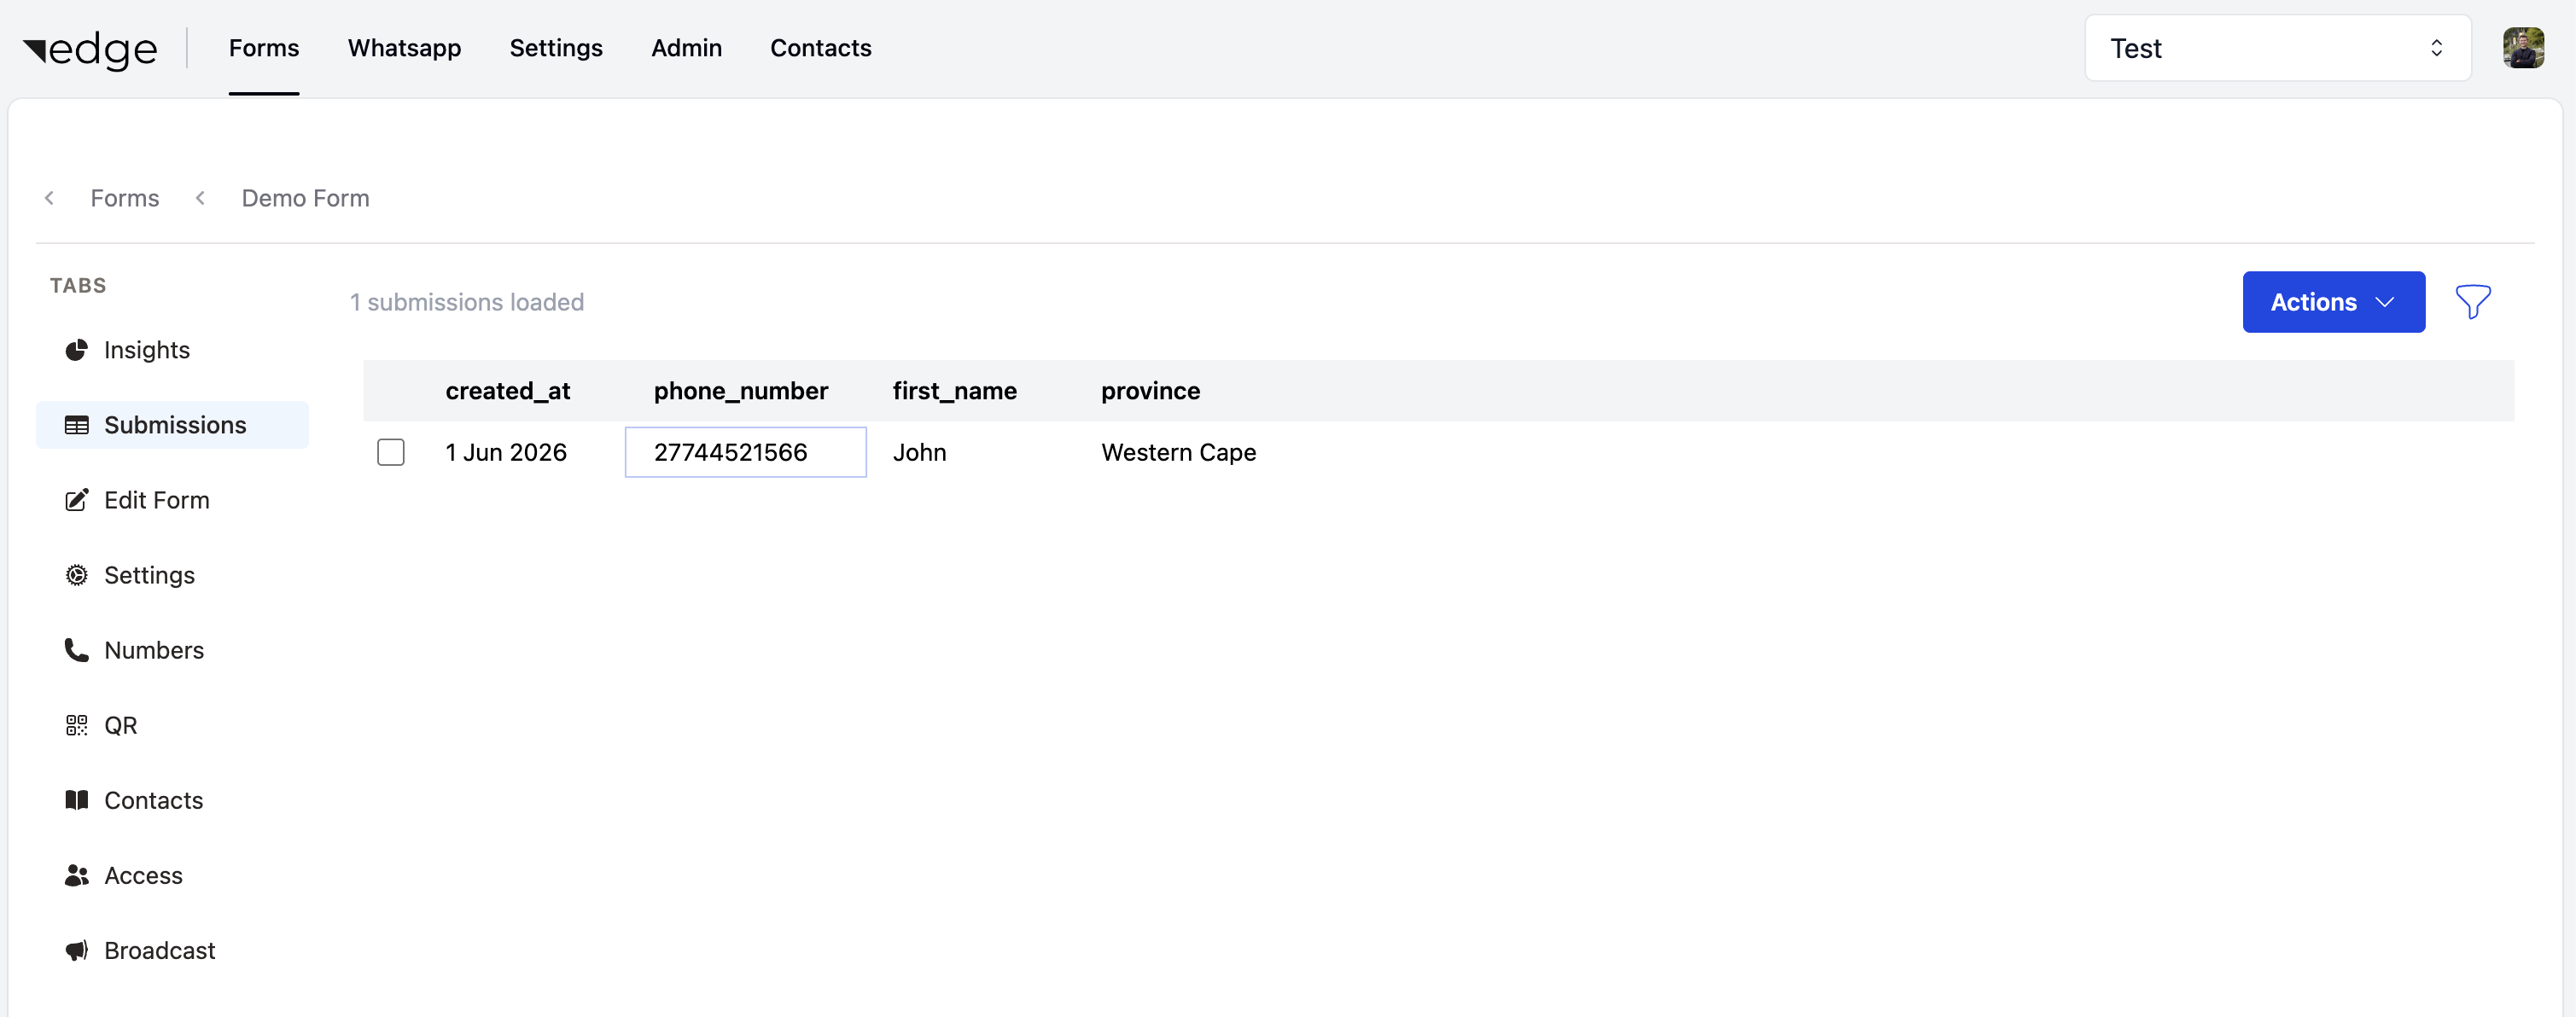
After submitting the form, you’ll have your first submission! You’d also receive the End Text as a message after submitting your form. To view the submission, navigate to the Submissions tab on the form:
This concludes the Getting Started run-through.